
You’ve just planted your tomato seedlings, and you’re already excited to harvest juicy, flavourful fruits! But a week later, the leaves start looking pale and the plants seem weak.
It’s frustrating, but it’s actually quite common.
The culprit isn’t always disease or pests —instead, it might be a nutrient deficiency. Tomatoes are heavy feeders, and giving them the right fertiliser at the right time is crucial.
A balanced NPK fertiliser is great for building strong stems and leaves early on, but once flowers appear, the requirements for tomatoes change.
Want a bumper harvest? This guide covers everything you need to know about fertilising tomato plants at every stage of the growing season.
Best Tomato Fertiliser | Before Fertilising Tomatoes | How to Fertilise Tomatoes | Feeding Tomatoes in Pots | Signs of Over or Underfertilising
What Nutrients Do Tomatoes Need to Thrive?
Tomatoes thrive on plenty of nutrients, which are necessary for fruit production and overall plant health.
These are what your plants need:
| PRIMARY MACRONUTRIENTS | Nitrogen (N) | Supports leafy growth and strong stems |
| Phosphorus (P) | Encourages root and flower development | |
| Potassium (K) | Improves fruit size and quality | |
| SECONDARY MACRONUTRIENTS | Calcium (Ca) | Prevents blossom end rot |
| Magnesium (Mg) | Helps the leaves stay green | |
| Sulphur (S) | Strengthens tomatoes against disease | |
| MICRONUTRIENTS | Boron (B), Iron (Fe), Manganese (Mn), Zinc (Zn) | |
The primary macronutrients, often called the “big three,” are the ones that tomatoes use the most throughout the growing season.
Secondary macronutrients are needed in slightly smaller doses. Still, they’re essential to boost fruit production and prevent common tomato problems.
The micronutrients are needed only in trace amounts, but are still crucial to grow strong plants.
What Is the Best Fertiliser For Tomatoes in Australia?
There’s no single “best” fertiliser for tomatoes!
While all tomato plants benefit from the same nutrients, the right fertiliser depends on many factors, like the soil condition and the plant’s stage of growth.
You also need to think about the type of fertiliser that suits your tomatoes.
What to consider when fertilising tomatoes
When choosing a fertiliser for tomatoes, keep these in mind:
SOIL CONDITION: Soil type, pH, and existing nutrient levels affect how well tomatoes absorb nutrients. Very poor soils also need more frequent feeding.
LOCATION: Plants in containers depend on a limited amount of soil, so they need to be fertilised more often than those in garden beds.
PLANT GROWTH: A tomato’s needs change as it shifts from the leafy growth stage to flowering and fruiting.
NUTRIENT DEFICIENCIES: You’ll need to supply additional nutrients if the plant is stunted or looks weak.
Types of tomato fertilisers
Tomato fertilisers may be made from organic sources or synthetic ingredients. Many gardeners prefer organic options because they also improve soil structure.
That said, synthetic types have their own advantages, especially if you’re looking for a more precise way to deliver nutrients. For example, some are specifically formulated to encourage more flowers or get larger fruit.
Here’s how organic and synthetic fertilisers compare:
| ORGANIC FERTILISERS | SYNTHETIC FERTILISERS |
|---|---|
| Derived from natural plant or animal matter | Uses man-made, concentrated nutrients |
| Acts as a soil conditioner; feeds beneficial microbes and worms | Does not improve soil structure |
| Nutrients are released more slowly and less predictably | Nutrient release is steady and consistent due to exact NPK ratios |
| Lower risk of burning tomato roots | Can cause salt buildup or root burn if overused |
Many gardeners use a combination of the two.
For instance, organic fertilisers can enrich the soil before planting, while a slow-release, synthetic fertiliser may be applied once the tomato plants are established.
Moreover, tomato fertilisers are either granular or liquid. Which one you use affects how quickly nutrients are supplied:
| GRANULAR AND POWDER TYPES | LIQUID TYPES |
| Often slow-release; provides a long-term nutrient source | Water-soluble and absorbed quickly |
| Suitable for well-prepared soils | Suitable for very poor soils |
| Best for a “steady diet” | Best for correcting nutrient deficiencies |
Whatever fertiliser you use, always refer to the label for specific directions so you don’t end up under- or overfertilising your plants!
Before Fertilising Tomatoes: Preparing the Soil

Tomato plants prefer sandy loam soil, as it drains well while still retaining nutrients.
Beyond the soil type, it’s also important to understand the pH level and available nutrients before planting tomatoes and choosing fertilisers.
Adjusting these early — about 2–3 months before planting — allows fertilisers to work more efficiently later on.
Step 1: Testing your soil
Testing your soil helps you identify which nutrients are already present and which ones are not.
This can be done through a soil testing laboratory. Simply send in a sample of your soil, and let them know you plan to grow tomatoes.
Afterwards, you’ll receive a detailed breakdown of nutrient levels, along with recommendations on how to correct specific deficiencies.
The test results usually show the soil pH level, too. However, you can also measure this at home using a test kit from a garden centre.
If you choose the DIY option, be sure to follow the instructions closely for accurate results.
Step 2: Adjusting the soil pH
Tomatoes grow best in slightly acidic soil, between 6.2 and 6.8 pH.
If the soil is too sour, it may block nutrients like magnesium or phosphorus. On the other hand, highly alkaline soil may prevent iron or zinc uptake.
Keep in mind that if you need to adjust the soil pH, it can take a long time, often weeks or months.
For acidic soils (pH below 5.5), you can add dolomite lime. It contains calcium and magnesium, which help neutralise acidity.
Sprinkle the powder evenly over your tomato bed, using the recommended amount per the packaging. Use a garden fork to mix the powder into the top 15–20cm of soil. Water deeply to help the lime break down.
For very alkaline soils (pH above 7.5), you can lower the pH with agricultural sulphur. It’s important to check the label to determine how much is needed for your soil type.
For soils that are only slightly alkaline, adding organic matter like pine bark works well. Layer about 5–10 cm on top of the planting area, and blend it in thoroughly.
If you’d rather not wait, growing tomatoes in large containers using premium potting mix can be a quicker fix!
Step 3: Improving the soil
If your soil is compacted, too sandy, or lacks nutrients, you’ll need to add soil amendments about a month before planting tomatoes. These are materials that can help improve the soil structure and fertility.
Just keep in mind that what your garden requires will depend on any specific deficiencies based on the soil test! Be sure to follow any specific recommendations from your soil testing lab.
In most cases, though, one of the most effective options is organic matter — such as high-quality compost or well-rotted cow or chicken manure. It’s suitable for compacted and sandy soils, and acts as a slow-release source of nutrients.
You can also mix in a handful of blood meal or bone meal to boost phosphorus and calcium.
If you’re using a vegetable potting blend, this is already rich, so there’s usually no need to add anything else.
How to Fertilise Tomatoes Throughout the Growing Season
As tomatoes grow, their nutrient needs change, so it’s important to adjust how and what you feed them.
Fertilising tomato seedlings
| WHAT TO USE | HOW OFTEN TO APPLY |
| Liquid seaweed tonic | Every 1–2 weeks |
If you’ve already prepared your garden bed with compost and a calcium source, additional feeding at this stage is optional.
However, you can still give tomato seedlings a liquid seaweed tonic like Seasol.
It’s not actually a fertiliser — rather, it contains hormones to encourage strong roots. It also helps young tomato plants recover faster from transplant shock.
Ideally, apply the tonic immediately after transplanting the seedlings.
Mix 3–5mL of seaweed tonic with 1L of water, or check the bottle for specific directions.
After backfilling the planting hole, use the mixture as a soil drench. Slowly pour about 500mL of the solution around the base of the plant. Make sure it absorbs well and doesn’t create a puddle on the surface.
Reapply the seaweed tonic every 1–2 weeks as the tomato seedling establishes.
At this stage, avoid high-nitrogen fertilisers. Otherwise, they can force the plants to produce more leaves while the stems are still weak!
Fertilising young tomato plants
| WHAT TO USE | HOW OFTEN TO APPLY |
| Slow-release, balanced NPK fertiliser | Every 1–2 months |
Once your tomato plants are established, they’ll enter the vegetative or leafy growth stage.
To produce healthy foliage and stems, tomatoes primarily need nitrogen, but it should be balanced with phosphorus and potassium.
You can apply a slow-release, balanced NPK fertiliser, like a 10-10-10 or 5-5-5 blend.
Ideally, choose one that’s designed for tomatoes or other nightshades. If you’re using organic fertilisers, look for ingredients like composted manure, fish emulsion, or worm castings.
Some gardeners use formulations with higher nitrogen (e.g. 10-5-5 or 8-4-4). However, this is suitable only if the soil lacks nitrogen, or your tomato plant looks pale.
Always water the soil before applying the fertiliser to avoid burning the roots of your tomatoes.
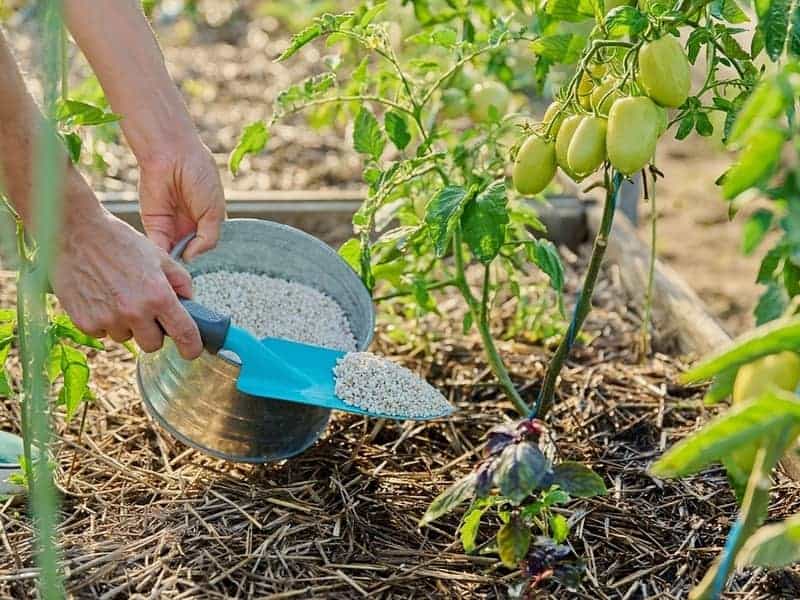
For granular fertilisers, use the side-dressing method. Spread the powder onto the soil, directly under the outer edge of the plant leaves (aka the drip line). Be sure to keep it away from the stem.
Lightly scratch the fertiliser into the top 1–2cm of the soil. Then, water the garden bed thoroughly.
Apply your NPK fertiliser every 1 or 2 months. The product label can also tell you the correct timing and amount to use based on your soil conditions.
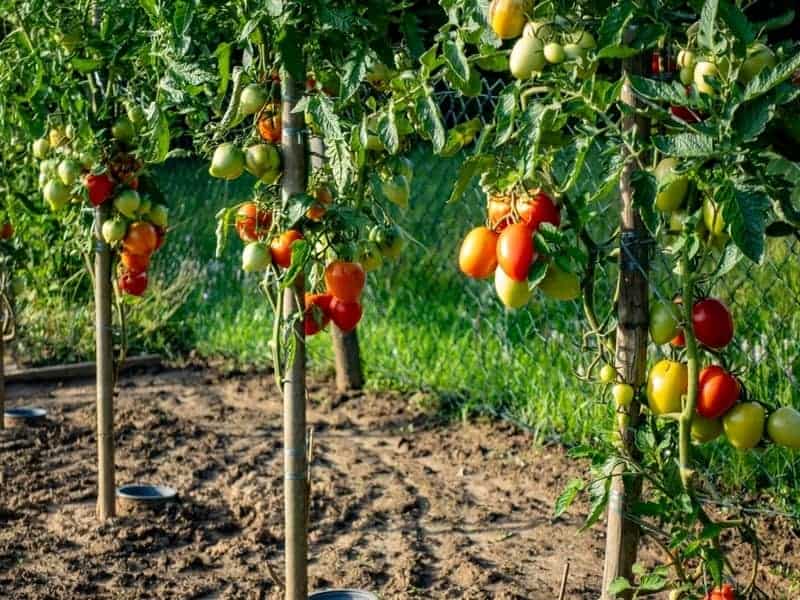
Fertilising tomatoes to get more fruit
| WHAT TO USE | HOW OFTEN TO APPLY |
| Slow-release NPK fertiliser (5-10-10 or 4-6-8) | Every 1–2 months |
| Gypsum (calcium source) | Once, when flowering starts |
When tomatoes begin to flower, they enter the reproductive stage. At this point, their needs shift as they focus on fruit development.
Once you notice flower buds forming, your tomatoes need:
- Less nitrogen: Prevents excessive leafy growth
- Higher phosphorus: Supports flowering and fruit production
- Higher potassium: Essential for large, flavourful tomatoes
To provide these nutrients, look for an NPK fertiliser with a lower first number and higher second and third numbers, such as 5-10-10 or 4-6-8.
Granular fertilisers are usually applied every 1–2 months. Lightly dust it onto damp soil as a side dressing, and always water it in thoroughly.
Additionally, calcium is critical at this stage to prevent blossom end rot. A good option is gypsum (granular type), as it won’t affect your soil pH. You usually only need to apply it once, preferably when the tomatoes start flowering.
Avoid calcium sources that can make the soil alkaline, like liquid lime. Calcium nitrate is also not ideal, since it’s high in nitrogen, not just calcium.
How to Fertilise Tomatoes in Pots

| WHAT TO USE | HOW OFTEN TO USE |
| Seedlings: Liquid seaweed tonic | Every 1–2 weeks or as specified on the label |
| Established plants: Balanced, liquid NPK fertiliser | |
| Flowering tomatoes: High-potassium fertiliser and a calcium source |
If you’re growing tomatoes in a container, your fertilising habits will look a bit different from those in garden beds.
The main difference comes down to how often you fertilise potted tomatoes.
Container-grown tomatoes need more frequent feeding because there’s less soil available for them. Nutrients are also flushed out of the pot each time you water, so you have to be consistent with fertilising.
Moreover, tomatoes in pots are more prone to issues like blossom end rot, which is usually caused by inconsistent watering and calcium deficiency.
To help your potted tomatoes thrive, liquid fertilisers are preferred since they can provide a quick boost. Dilute the liquid fertiliser at half strength (or per manufacturer directions), then feed your potted tomatoes every week.
You can sometimes stretch the schedule to every 2 weeks. Just be sure to look out for signs of nutrient deficiencies as your tomato grows.
Are You Fertilising Tomatoes Too Much or Too Little?
Finding the right fertiliser balance isn’t an exact science, so it’s important to watch your plants closely.
Signs that might be underfertilising tomato plants include:
- Stunted growth
- Yellowing leaves
- Poor flowering or fruiting
- Pale leaves with green veins
On the other hand, these symptoms might mean you’re overfertilising tomatoes:
- Brown tips on leaves
- Excessive leafy growth
- Wilting or drooping plants
- White deposits on the soil surface
Remember: these can also indicate other tomato problems or diseases, so make sure you check for those before adjusting your fertiliser!
More Tips to Keep Tomatoes Healthy
It’s important to give your tomatoes the right start so they grow healthy.
If you’re growing tomatoes from seed, getting the timing right is crucial, as these plants are sensitive to cold temperatures. They also need 6–8 hours of sunlight daily.
Once they’re established, fertiliser alone isn’t enough to keep them thriving. Tomatoes also rely on consistent watering to produce juicy and tasty fruit.
Moreover, some tomato varieties (specifically indeterminate types) require more care. You’ll need to set up sturdy tomato supports, and regular pruning is a must.
If this feels like a lot, professional gardeners can help set up your garden and guide you through proper plant care!
FAQs About Fertilising Tomato Plants
Looking for more advice on feeding tomato plants? Check out the Q&As below!
Can I use a homemade fertiliser for tomatoes?
Definitely! There are plenty of homemade fertilisers you can use:
| HOMEMADE FERTILISER | BENEFITS | HOW TO APPLY |
| Coffee Grounds | Contain nitrogen; great for the leafy growth stage | Sprinkle a thin layer around your plants, and mix onto the top 1–2cm of the soil. |
| Compost Tea | Provides beneficial microbes | Steep a shovelful of aged compost in a 10L bucket of water for 1–2 days. Once it looks like weak black tea, use that to water the soil. |
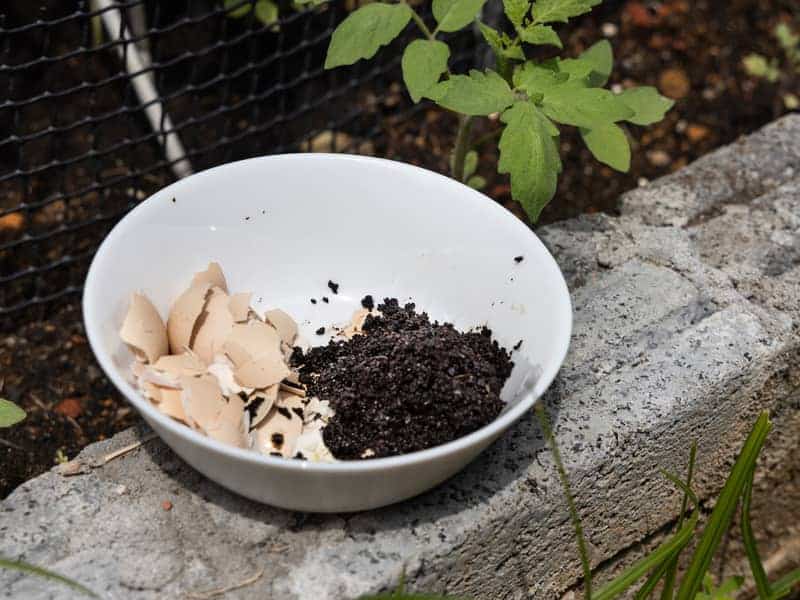
| Crushed Eggshells | A slow-release source of calcium | Mix the powder into the hole at planting time, or use it as a side dressing once flowers appear. |
| Diluted Urine | Quick fix for nitrogen or phosphorus deficiency | Mix 1 part urine and 10 parts water. Pour the mixture 10–15cm away from the main stem. |
| Wood Ash | High in potassium and calcium; encourages flowers and fruit | Only use ash from natural wood. Apply it as a side dressing once in the season to avoid raising the soil pH. |
| Worm Castings | Contains NPK, trace elements, and growth hormones | Take castings from your worm bin, and put them inside an old stocking or any porous bag. Soak in a bucket of water overnight, and use the “tea” made from worm castings to water your plants. |
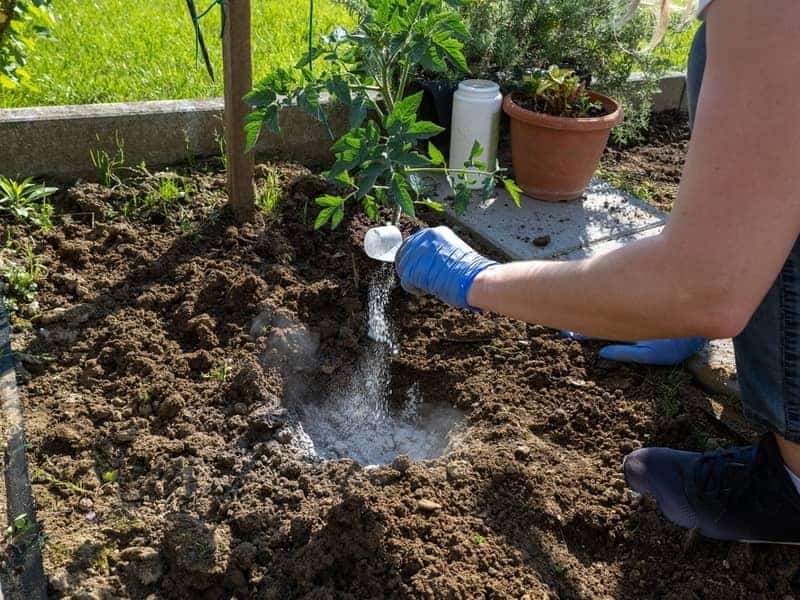
What does Epsom salt do for growing tomatoes?
Epsom salt supplies magnesium and sulphur. It’s useful for tomatoes with magnesium deficiency, which shows as yellowing leaves with green veins (aka interveinal chlorosis).
Magnesium also supports chlorophyll production, allowing the plants to convert sunlight to energy.
However, Epsom salt is suitable only if a magnesium deficiency is present. Otherwise, it can block calcium absorption!
To use Epsom salt, mix 1tbsp with 4L of water. You can use that as a foliar spray applied in the early morning, or just pour it around the base of the plant.
Is Seasol good for tomatoes?
Yes, a seaweed-based tonic like Seasol is great for tomatoes! It’s made from kelp meal, and contains growth hormones and trace minerals that tomato plants need.
It’s also helpful for potted tomatoes or for those in sandy soils. Just keep in mind that it won’t provide the big three nutrients (NPK), so you have to use it alongside your primary fertilisers.
You can use Seasol throughout the entire growing season. Apply it every 1–2 weeks, and always follow the dilution rates on the label.